How to Create Custom Fusion 360 Drawing Templates

Cortex Design is integrating Fusion 360 into our existing design process. In order to work with our vendors, we need Custom Drawing Templates in Fusion 360. This is not a feature that the Fusion team has implemented yet, so here’s how we made it work:
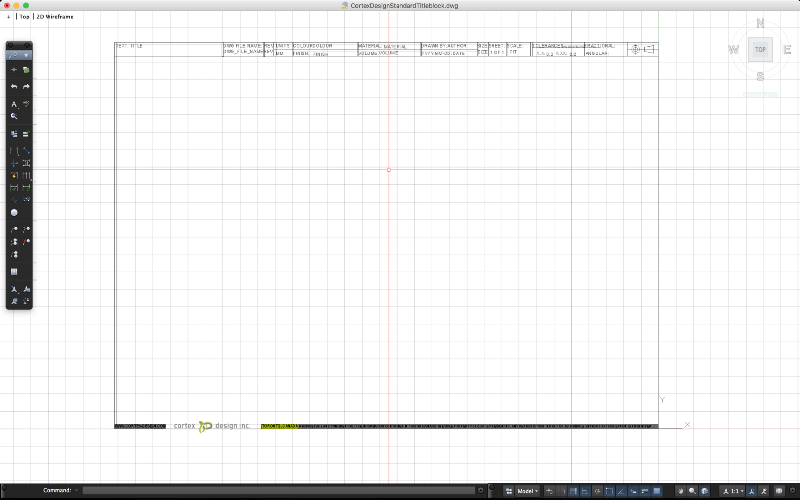
Step 1: Draft your title block in AutoCAD
One of the most important parts of the drawing workspace is the ability to customize engineering drawings with your organization’s branding.
There is currently no option to make your custom title block in Fusion. The best way to go around this is to draft your title block in AutoCAD and import that DWG into Fusion.
To draw your title block in AutoCAD, start by opening the program and selecting the acad.dwt template.
You probably want to use a custom logo. It is important to know that Fusion cannot import blocks or XREFS. Before you import them, explode them until they no longer exist. XREFS need to be detached from the references dialogue box, not simply deleted.
Once in the drawing workspace, sketch out what you’d like your title block to look like. Make sure you pay attention to the sheet sizes for your title block.
Note: It is important that the AutoCAD units match the Fusion 360 units. If they are not congruent, the completed drawing cannot be rescaled in Fusion 360.
To create custom fields which can be filled out later (Author, File name, etc.) Use the ATTDEF command.
A note on line weights: Line weights can be carried through from AutoCad to Fusion 360 if set up properly in layers. Choose line weights by layer. It is a nice method to ensure a professional output once you generate your completed PDF.

Once you’ve finished. Save your file as a .dwg and we’ll be importing that into Fusion360 soon.
If you aren’t familiar with AutoCAD, no worries. There are a number of AutoCAD alternatives which you can try out, such as: SketchUp, QCad, or LibreCAD.
Step 2: Import title block into Fusion drawing.
Delete the default title block and import your custom title block.
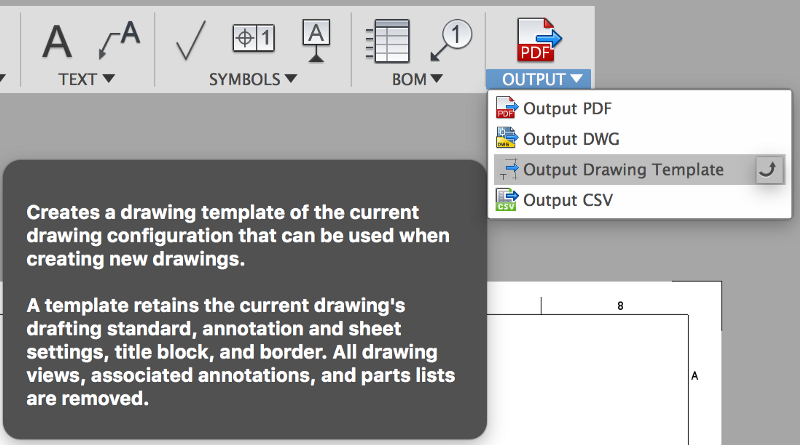
Step 3: Save your drawing as a template
Before filling out any fields, save your drawing as a Drawing Template.
Step 4: Happiness 🙂
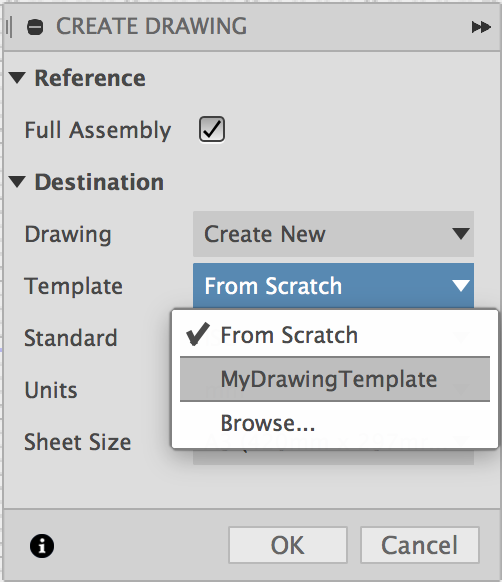
Now that you have saved your drawing template, you’ll be able to select it before entering the drawing workspace. Click the “Create Drawing” pull out, and in the “Template” dropdown, you’ll be able to select your drawing template. If there isn’t an option to select your drawing template, click browse and find your drawing template on your machine.
Fields in this drawing can be filled out as needed. You can program these fields directly in AutoCAD to speed up the drawing process.
The Fusion team is updating and improving the program every day. You can find release notes and a product roadmap here.
Additional Resources: Fusion 360 Community