Medical Device Prototyping Explained: Stages, Techniques, and Challenges
What Is Medical Device Prototyping and How Is It Different From Non-Medical Devices?
Medical device prototyping is the process of turning a scientific idea into a tangible product and progressively refining it through iterative development. While the process is similar to that used for non-medical devices, medical device prototyping has an additional emphasis demonstrating not only effectiveness against a specific disease or condition but also safety and compliance with strict regulations.
Medical device prototyping progresses through stages, each with a different purpose. At Cortex, the early stage is generally about proving that core ideas (i.e., a scientific principle or a technology application) are feasible. Later, it’s about integrating those ideas into something that resembles the final device. Along the way, prototyping is used to test usability, evaluate user safety, explore different materials and manufacturing methods, and verify functionality before volume manufacturing commences.
Ultimately, the goal is to arrive at a prototype that looks and functions like the finished product, ready to support manufacturing, regulatory approval, and commercialization.
Prototyping bridges the gap between scientific discovery and a safe, market-ready medical device.
Watch this video explaining three common prototyping mistakes and their consequences.
The Stages of Medical Device Prototyping
While the structure and purpose of these stages vary from company to company, at Cortex, we use prototyping to advance our design and engineering work throughout development. Early iterations typically focus on rapid learning and risk reduction, while later versions emphasize refinement and regulatory readiness. Our goal is always to reduce risk and build confidence before investing heavily in the final product.
Across stages, we often follow two pathways simultaneously: “works-like” prototypes, “looks-like” prototypes, or a combination of both.
- Works-like prototypes: designed to reproduce the underlying physical processes of the proposed device. They are used to determine engineering requirements and explore how bench-top functionality can be reproduced reliably and cost-effectively.
- Looks-like prototypes: represent potential physical forms of the device as they would exist in their target environment. They are used to understand how the device will interact in its intended setting, such as an operating room, a doctor’s office or in the patient’s home.
*We’ve loosely aligned the following stages with industry terms: Engineering Validation (EVT), Design Validation (DVT), and Production Validation (PVT)
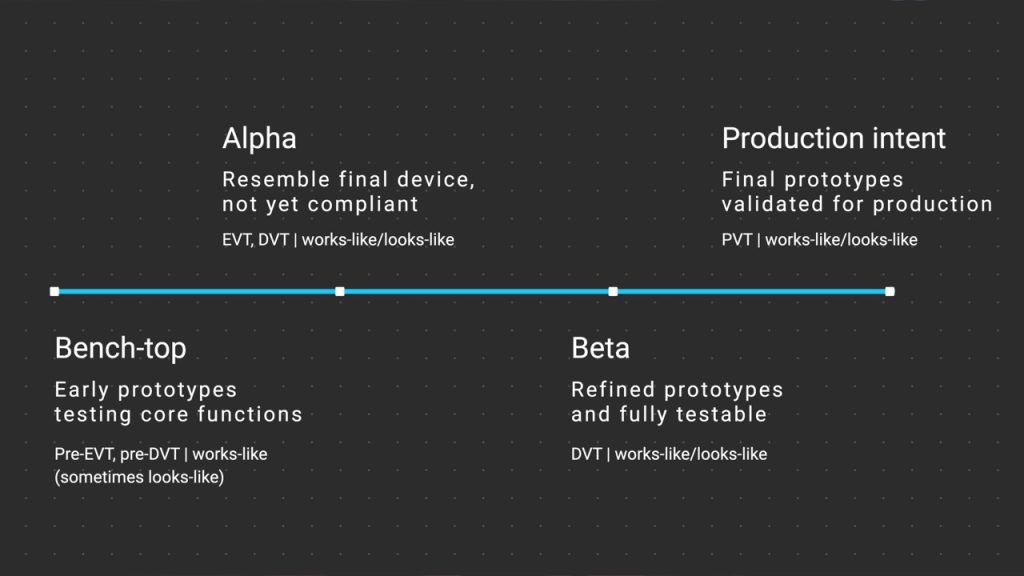
1. Functional or bench-top prototypes
Pre-EVT, pre-DVT | works-like (sometimes looks-like)
These earliest prototypes often don’t look anything like the final device. They may be circuit boards with wires or even cardboard and tape mockups. The goal is to test ideas quickly, validate whether a subsystem works, and role-play early use cases. These prototypes are inexpensive, messy, and disposable, helping teams uncover risks without wasting resources.
In some cases, these early prototypes exist entirely in laboratory or academic settings, where general-purpose equipment is used to prove the feasibility of a novel process/method. This work establishes a solid scientific basis for a new method of treatment or diagnostics, and is often supported by peer review. Once this scientific basis is established, teams can use it to define the core functional requirements of the medical device.
2. Alpha prototypes
EVT, DVT | works-like/looks-like
These are the first versions that start to resemble the final device in size, shape, and usability. You can hold and test them, but they still don’t meet all the technical or regulatory requirements. Their purpose is to show how close the concept is to reality and to identify the “gap” between what exists and what will be required for market success.
3. Beta prototypes
DVT | works-like/looks-like
Beta prototypes refine what the alpha versions revealed. They are closer to meeting all design requirements– such as regulatory specs, performance standards, or durability expectations. By this stage, the prototype isn’t made with a full-scale production process, but is a true testable product, which can undergo rigorous usability studies, reliability checks, and regulatory evaluation.
4. Production intent prototypes
PVT | works-like/looks-like
This is the final step before manufacturing, and as the name suggests, its intent is production validation. At this stage, the design, materials, and manufacturing processes closely reflect those of the final product, but are executed using tooling intended for lower production volumes.
For example, an injection-moulded part would be produced using a lower-cost aluminum mould during this phase, whereas its final version would use hardened tool-steel moulds, capable of producing hundreds of thousands of parts. This lower-cost tooling (aka “bridge tooling”) is the final opportunity to mitigate risk in the design before making a significant investment in production tooling.
Medical Device Prototyping Techniques
Different prototyping techniques are used depending on the stage of development, ranging from quick, low-fidelity mockups to high-fidelity, production-like models. At Cortex, we handle many of these in-house.
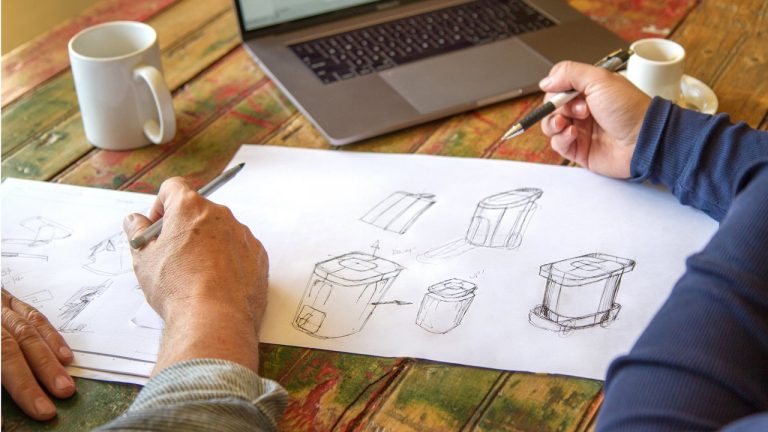
1. Simple materials
In the very early stages, prototypes are often built from paper, cardboard, clay, foam, plastic, or metal. These quick models are fabricated in a shop to rapidly test ideas, role-play use cases, and visualize the product in physical space.
2. Simulation and virtual prototyping
Digital prototyping tools allow teams to test designs before building physical parts. Computer simulations can model stress, airflow, fluid dynamics, or ergonomics, reducing costs and helping narrow down design decisions early in the process.
3. Additive and subtractive manufacturing
As development advances, additive manufacturing techniques like 3D printing (both FDM and resin printing processes) become central tools. By using a range of materials, from flexible to rubber-like plastics to rigid ceramic-like resins, teams can mimic the mechanical properties of real production parts. This flexibility allows for rapid iteration and realistic testing without the cost of full manufacturing. That said, there is still a place for more traditional subtractive manufacturing methods, such as CNC prototyping.
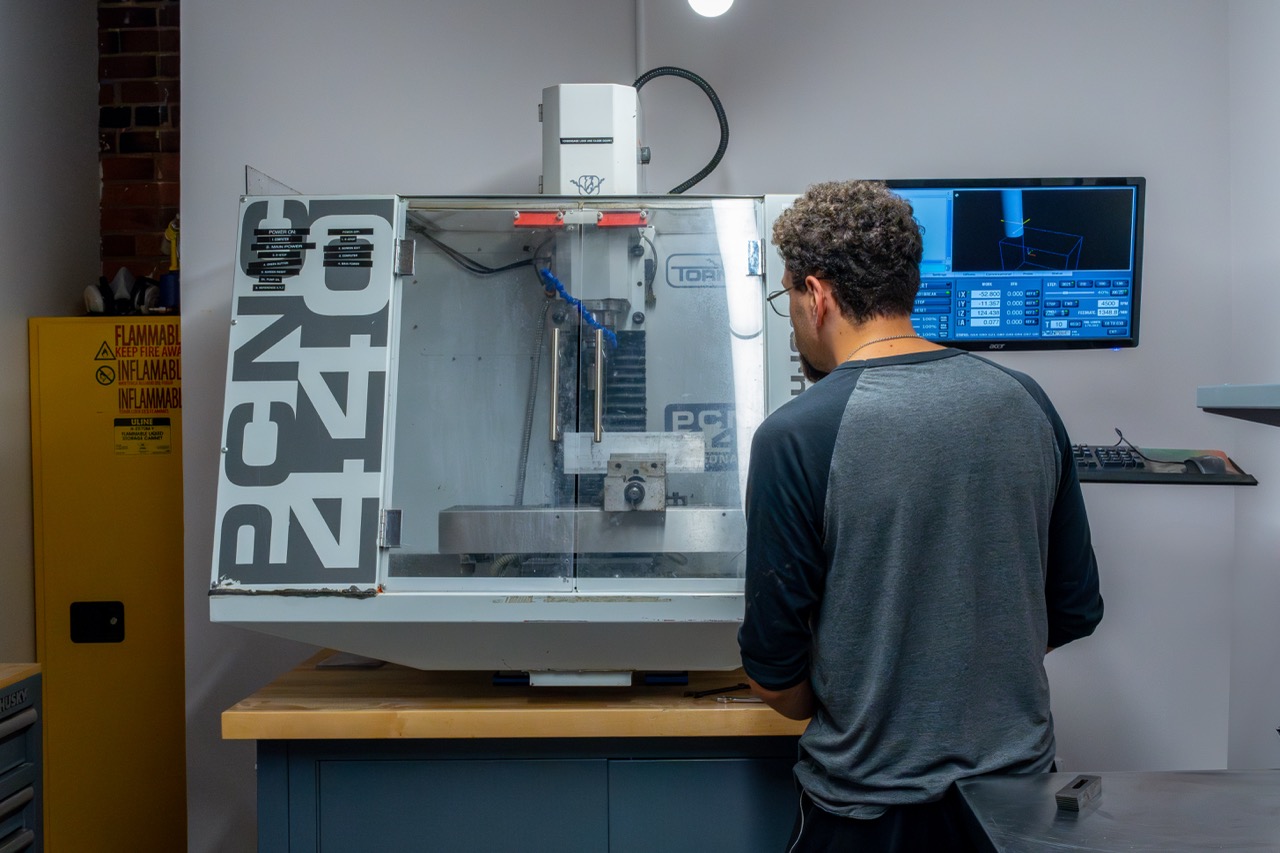
4. CNC prototyping
CNC machining is usually used for later stages. This subtractive process carves parts from solid blocks of the actual materials intended for the final device, such as ABS, polycarbonate, or optical-grade lenses. These prototypes can be nearly indistinguishable from the production units in look, feel, and performance. However, they are more expensive since they are custom one-off builds rather than mass-produced parts.
5. Sheet metal fabrication
When prototypes require enclosures, brackets, or housings, sheet metal fabrication provides a fast and reliable option. Techniques such as laser cutting, bending, and forming allow teams to quickly create strong, durable parts often used when devices need EMI shielding or structural strength.
6. Injection moulding (pilot runs)
Prototype injection moulding is a way to create low-volume parts that closely mirror mass-production plastics. It’s especially valuable for testing usability, validating material selection, and evaluating manufacturability before investing in full-scale tooling.
How to Choose the Right Prototyping Fidelity
The right level of fidelity (how realistic a prototype needs to be) depends entirely on the goal of that prototype.
For internal problem-solving and exploration
When the goal is to understand use cases — how people might interact with the device, what shape it should take, or where it fits in a workflow — low-fidelity models are often enough. Paper, cardboard, or simple 3D prints help teams visualize ideas, role-play scenarios, and experiment with functionality without wasting time or budget.
For external validation
When the goal is to impress investors, demonstrate progress to a board, or unlock funding, higher-fidelity prototypes are needed. These look and behave more like the final product, often made with advanced techniques such as CNC machining or resin printing in production-like materials.
The key principle: Don’t overbuild. Use the lowest-cost, fastest method that solves the specific problem at that stage. Over time, fidelity naturally increases as the stakes and expectations get higher.
“In all cases, we’re trying to use the method of prototyping that’s going to be most cost-effective to solve the problem that you have.”
At Which Stage does Testing Fall?
Testing should happen throughout the entire medical device prototyping process, not only at the end of development. What changes is the level of rigour applied at each stage.
Early-stage testing is informal and fast
At this stage, testing isn’t heavily documented. Teams are in exploration mode, recording observations, testing mechanisms, and trying out design theories. These tests are quick and low-cost because the focus is on learning and de-risking before investing more.
Later-stage testing is formal and structured
As requirements become clearer and the design stabilizes, testing becomes more rigorous. Teams create detailed test protocols that define how the prototype will be evaluated, what “success” looks like, and what data must be captured. Prototypes are tested with calibrated equipment to confirm they meet specific technical or regulatory standards.
While many tests can be run in-house, others require third-party partners, especially when specialized equipment, certifications, or regulatory qualifications are needed. These external tests are more expensive and time-consuming, so they’re usually reserved for later stages when the design is mature and likely to pass.
Testing and Market submission
Prototype testing not only guides product development but also provides the evidence required for regulatory approval. When preparing a market submission, such as an FDA 510(k), companies must demonstrate that their device meets defined design controls and performance requirements. That means showing you’ve defined what the product is supposed to do, what “success” looks like (specifications), and that testing has documented the device meets those specifications.
While some early testing can be done informally in-house, regulatory submissions demand precise, third-party testing with accredited equipment to verify that the device meets safety and performance standards. For example, tests for electromagnetic interference (EMI) and electromagnetic compatibility (EMC) require specialized, calibrated equipment, and regulators will only accept independent reports from accredited labs.
Challenges and Mistakes in Medical Device Prototyping
Prototyping is essential to medical device development, but it comes with its own set of challenges. Understanding these pitfalls can help teams avoid costly mistakes.
Material limitations can mislead your troubleshooting
Material limitations
It can be difficult to prototype with certain types of materials. For example, gaskets are easy to mass-produce but harder to make in small quantities. It’s doable, but they’re more likely to fail, which poses another challenge (see next).
Misinterpreting failures
When a prototype fails, the challenge is knowing whether the problem lies in the design itself or in the limitations of the prototyping method. Engineers need experience to tell the difference. Otherwise, teams may end up “fixing” a design that was actually fine.
Over-engineering prototypes to make them work
Prototypes often fail more easily than production parts because they are built with weaker materials or less robust methods. A common mistake is to “over-engineer” a prototype so it survives. For instance, making snap fasteners thicker than necessary so they work in 3D-printed parts. This can lead to an overbuilt design that is larger, heavier, or more material-intensive than required in production, simply as a way of compensating for prototyping limitations.
Ignoring regulatory requirements when prototyping electronics
With electronics, teams often focus on functionality first and overlook regulatory requirements (like EMC – electromagnetic compliance and ESD – electrostatic discharge). A device may seem to work fine as a prototype, but when tested in an EMC chamber, it can fail because wire harnesses are too long or not properly shielded. If this is discovered too late, teams are forced to rely on “band-aid solutions” (such as shielding sprays, ferrite beads, or metallic coatings) that add bulk, complexity, and cost.
The key to overcoming all these challenges is experience and foresight — knowing which problems are real, which are artifacts of prototyping, and how to design in ways that prevent costly late-stage “band-aid” fixes.